


I hear your thoughts, “if she thinks that I have time to can Green Beans, she is CRAZY!” “I would rather just pay for beans at the store”. “I just want to come home, get dinner on the table and move on with life!” But, my dear friend, Canning your own food DOES SAVE you time! This is EASY GREEN BEAN CANNING FOR BUSY PEOPLE
So, let’s imagine a typical evening. You run drag yourself in the door after work. There is exactly one thing in the fridge – hamburger for grilling. What goes great with a hamburger? YES! Green Beans! Everyone at your house likes them, right? Maybe some people don’t exactly like them, but can drown them in enough ketchup to choke them down (sorry – that was a throwback to MY own childhood there). What could possibly be easier than opening a jar of home canned green beans and heating them on the stove top with a pat of butter and some salt and pepper? Nothing!
Spend one Saturday afternoon canning a few green beans and you have the ultimate in TIME AND MONEY SAVINGS! You will have green beans on your pantry shelf to last you for several such occasions! You’ll be proud of yourself for providing delicious safe food for your family! And you can do it – it is so simple! You are the kitchen rock star after all, cause I’m gonna help you to be! With home canned food, you can make dinner ( in less than 30 minutes) with things your family will eat and you don’t have to spend hours in the kitchen when it’s time to eat either!
WHAT IS EVEN INVOLVED IN EASY GREEN BEAN CANNING FOR BUSY PEOPLE
And let me tell you – nothing could be simpler than canning green beans. Here is the bird’s eye view:
- Wash the bean
- Break the beans in pieces – you can do this while watching TV (we did)
- Scrunch as many beans as you can into a hot jar
- Cover the beans with boiling water
- Put the lids on the jars.
- Put the jars in the pressure canner
- Bring to pressure and cook for 25 minutes
- Let pressure come back to normal
- Remove from the canner and store on the shelf.
You can do that! Right? RIGHT! It’s simple.
WHERE TO FIND BEANS FOR EASY GREEN BEAN CANNING FOR BUSY PEOPLE
Let’s go over it. If you live near me – go see Frank at the 89 Farm Market and he will hook you up on beans! If you don’t have a Frank – then head to your local farmer’s market.
You can also find fresh green beans at roadside stands and of course, at your local grocery store.
HOW MANY BEANS DO I NEED?
Typically, a bushel of green beans = about 20 quart jars of green beans. A bushel of beans will take one person an hour or two to break – the LONGEST part of canning beans.
A bushel is a crate that is about 2 ft wide, 1 ft deep and 1 ½ feet tall.
1 1/2 – 2 1/2 lbs of beans = 1 quart of beans. If you want to do just 7 Quarts (1 Canner full – for me anyway) then buy 10.5 lbs – 17.5 lbs of beans. I recommend that if you have never canned beans before, just plan to do one canner load for the first time.
WHAT TO LOOK FOR IN YOUR BEANS
The beans you have for canning should be:
- Fresh – no signs of aging – no withering, dark spots, dried out pods
- Not many bad places (brown spots).
- A fresh bright green color – if the color is very dark and drab then the bean might be getting old.
- I always look for stringless – but that is a personal choice – String Beans have strings and taking the string off is an extra step in breaking them
- Take a bite! Does it taste fresh? Is the inside wet and bright green? Then Good!
- Break a bean before you buy – does it crisply snap in two? If it is rubbery and bendy – its old. Move on.
- Smell the bean. Does it smell fresh and green? Good! Does it have a sour odor – if so, move on.
- See the color of these beans? See how there are hardly any spots? The all snapped crisply when broken? Those are the kinds of beans you want for canning

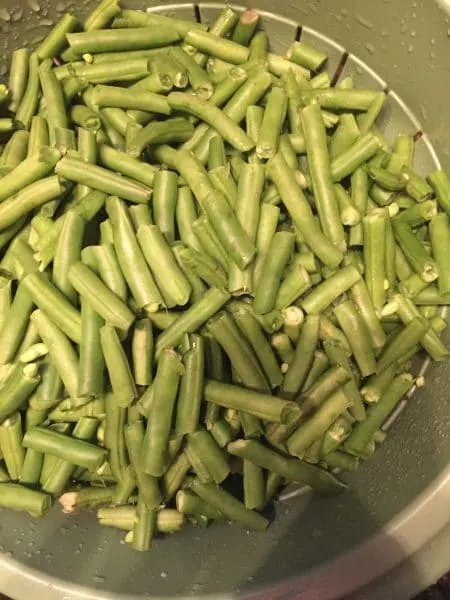
THE BEANS – ALL BROKEN AND READY TO USE
WHY YOU WOULD WANT TO CAN YOUR OWN GREEN BEANS
Why do I want to store these summer green beans for winter eating?
- I am in control of and know precisely what is in the jar.
- The produce was grown RIGHT HERE locally – or local enough – I am supporting my local farmers rather than some big food conglomerate.
- If something should happen and I can’t go to the grocery for a while, I have plenty of food ready to go.
- I believe there might be some health benefits to eating food grown locally – call me crazy – but that is what I think.
- I enjoy feeling self sufficient by canning my own food.
- Home canned Green Beans simply taste better – no arguing there.
***This post may contain affiliate links which won’t change your price but will share some commission. 10% is tithed. I include the links here so that you will have a good mental image of what you need to have. If you purchase a different brand or from another source – that is fine – I just want you to know what you will need.
IMPORTANT WORD OF CAUTION
Always use good reference material. The Ball Canning Book is considered the BIBLE of canning. I always have a copy of this open and reference it over and over while working. I would never ever start any canning job without having my Ball Book close at hand. The instructions I give here come from the Ball Book – because that is how I learned to can. ***CLICK THE PHOTO IF YOU WANT TO RUN OVER TO AMAZON TO LOOK AT IT***

SUPPLIES YOU WILL NEED
You will need the following items to successfully can summer green beans by the raw pack method.
- Three large bowls for breaking beans***CLICK THE PHOTO IF YOU WANT TO RUN OVER TO AMAZON TO LOOK AT IT***

/p>
- A sharp knife – for removing bad spots***CLICK THE PHOTO IF YOU WANT TO RUN OVER TO AMAZON TO LOOK AT IT***

/p>
- Canning jars – I use quart jars, but you can use pint jars if you prefer a smaller portion per jar. I want to say – because it happened to me this weekend – I always use Ball or Kerr jars ONLY. I have a few other jars in my collection that come from other sources and I am never happy with them. The screw bands don’t go on right and are a pain. I have had a lot of breakage using other brands of jars. You might save money on the jar – but when you have worked so hard to get your green beans into the canner and then a jar breaks and you lose the whole jar – THAT is disappointing.***CLICK THE PHOTO IF YOU WANT TO RUN OVER TO AMAZON TO LOOK AT IT***

/p>
- A large amount of clean water
- Table salt or Kosher Salt (I use Kosher)
- Colander***CLICK THE PHOTO IF YOU WANT TO RUN OVER TO AMAZON TO LOOK AT IT***

/p>
- It is always a good idea of to a copy of The Ball Book. I consider this my “Canning Bible”. I never can anything without consulting this precious book.***CLICK THE PHOTO IF YOU WANT TO RUN OVER TO AMAZON TO LOOK AT IT***
/p>
- A pressure canner. I have and 100% recommend the All-American Canner. It is a HOSS and a BOSS! I wouldn’t even try any other canner if it were offered to me. That is how much I love my All-American Canner. Please note that this canner can not be used on a glass top stove. That is why you will see in the photos below that Sweet Hubby and I do our canning out on our deck with a propane burner or a camp stove.***CLICK THE PHOTO IF YOU WANT TO RUN OVER TO AMAZON TO LOOK AT IT***

/p>
- A small sauce pan for heating your lids
- A way to heat your jars prior to filling them. I heat mine in the oven or in the dishwasher – the Ball Book recommends boiling them in the canner as you are heating your water. Your choice.
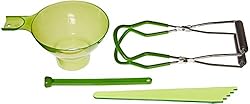
- A few basic canning tools – these are usually available at your grocery in the canning section in a kit – here is what I am talking about.***CLICK THE PHOTO IF YOU WANT TO RUN OVER TO AMAZON TO LOOK AT IT***
/p>
HOW TO START THE PROCESS OF CANNING BEANS
First wash your beans – rinse them well. Then find a cool place to sit (outside under a shade tree – in the living room in front of the TV – its up to you). Even the smallest children can help break beans.
Use your three bowls as follows:
- One for putting the beans that need to be broken – you will replenish this as you run out.
- One bowl for putting your end pieces, strings and bad spots in.
- One bowl for putting your snapped beans into.
Snap off both ends of the bean. Then snap the bean into 2-3 pieces that are 1- 1 ½ inches long (mouth sized). Remove any bad spots before snapping. Keep snapping until they are ALL SNAPPED. This process seems to take FOOORRRREEEVVVVERRRRRR.
As you are near the end of snapping beans, go heat up your jars and your lids. I put my jars in the oven at about 175. I put my lids in a saucepan and cover with water and set the eye on medium low – if it looks like it wants to boil, I turn it down. Put on a large pan of water (6 quarts or so) to boil.
THE BEANS – ALL BROKEN AND READY TO USE
PACKING THE JARS
This is the RAW PACK method.
- Rinse your beans again. Then, using your hands, (wash hands good first), begin filling the hot jar with green beans. You have to jiggle the jar a little so that the beans settle. As the jar becomes about ¾ full, use your fingers and really pack those beans down in there tightly. I press VERY HARD!
- Once you have the beans packed in the jar to within 1 inch of the rim, set them aside and proceed until you have as many jars as will fit in your canner. For me, this is 7 quart jars. Place 1 tsp of salt into each jar.
- Then, using a cup (I use my pyrex measuring cup – but any cup or ladle will do), pour the boiling water over your green beans until the water reaches 1 inch from the rim of the jar. Repeat until all jars are filled.
- Use a plastic knife and gently work the knife around in the jar to release trapped air bubbles. Replace any water that might have been lost in the process
- Wipe the jar lids well with a damp paper towel in order to remove any debris that might be on the rim – we want the lid to seal well and it can’t seal if there is stuff clinging to the jar rim.
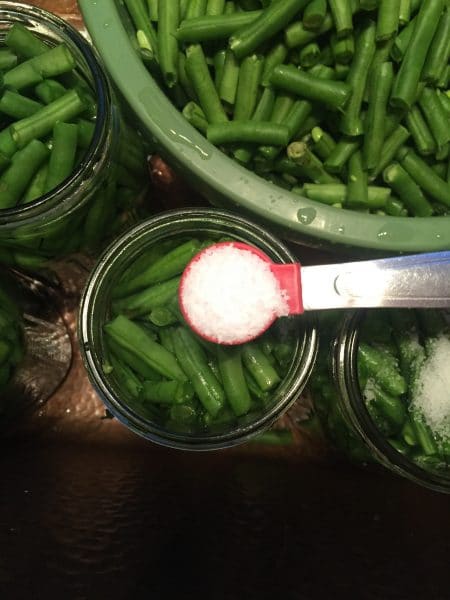

The jars are packed and ready to add the salt
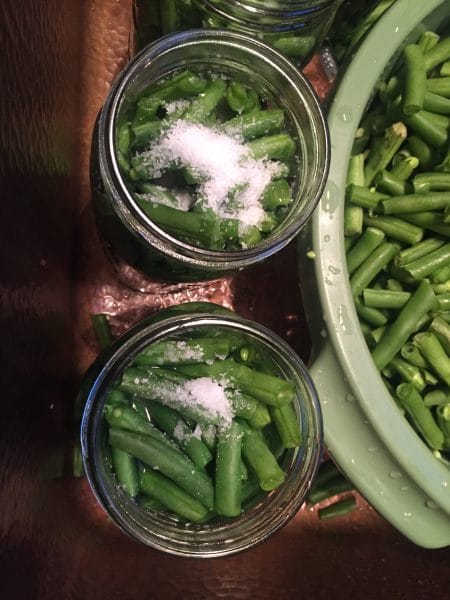
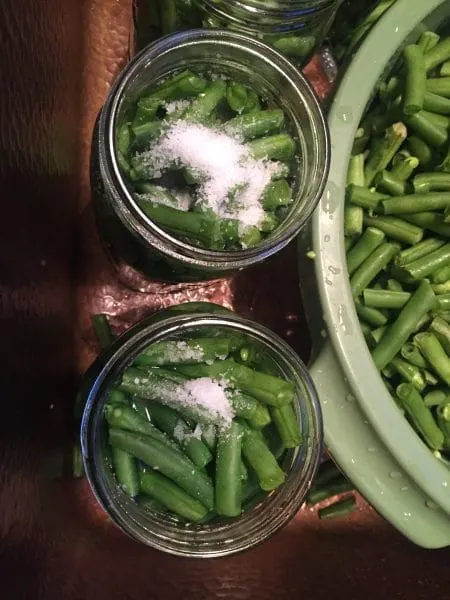
Salt in the jar – ready to add boiling water over the top

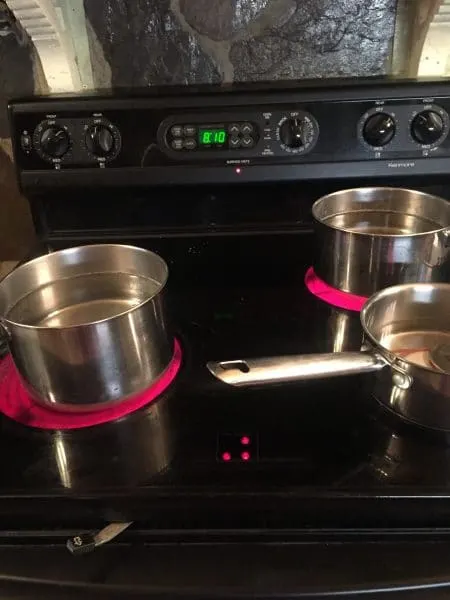
Boiling water on the stove top ready to pour over the beans.
PLACING THE LIDS
Using your magnet (I HIGHLY recommend having a lid magnet – don’t burn your precious fingers!) Lid magnets are very affordable and available at your local grocery in the canning section – usually in a kit for canning (see link below) , lift the lids from the hot water, place on the jar and then place the screw band and tighten to fingertip tight. Be careful not to touch the sealing area of the lid.***CLICK THE PHOTO IF YOU WANT TO RUN OVER TO AMAZON TO LOOK AT IT***
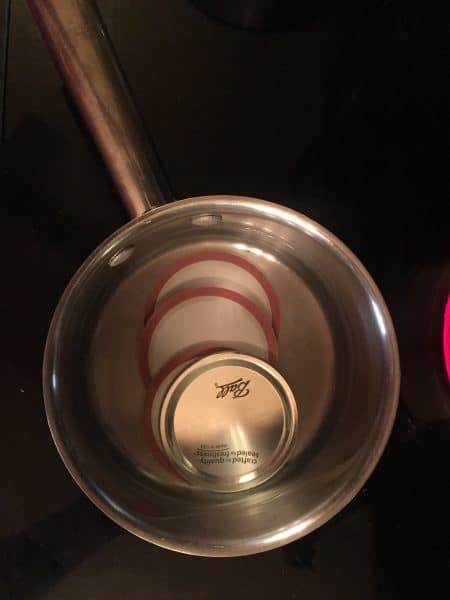
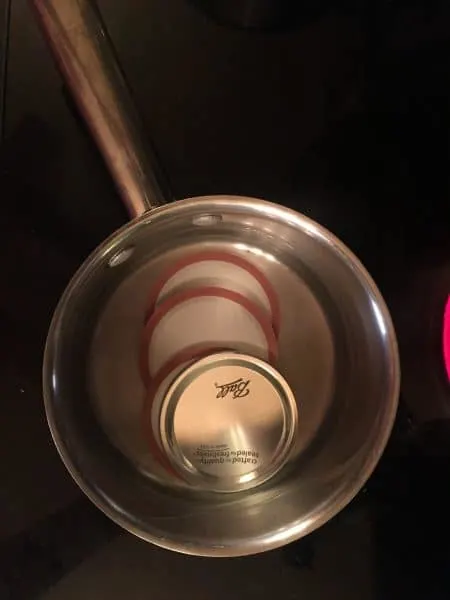
The lids heating – to be placed on the hot jars
I somehow over tightened a few of my jars this year – here is what happens when you do that. The lid buckles. The lid must be on tight enough, or the water in the jar will escape – but not too tight, or the lid will buckle. This is just something you learn the feel of as you do more canning.

If you tighten the jar too tight – this buckling of the lid can happen.
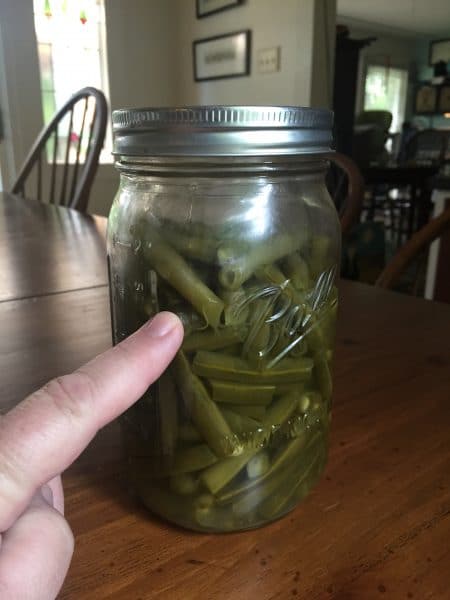

IF the lid is too loose – then the water will siphon from the jar at the end of canning – my finger is pointing to the water line in the jar.
PREPARE YOUR CANNER
You will have to read the directions that came with your pressure canner to understand how to prepare your canner. For my All-American Canner, this means oiling the lid, checking the pressure gauge hole to make sure it is clear. Checking the weight to make sure it looks right. Putting about 4-5 inches of water in the canner and starting to heat the water.
CAN THE BEANS!
Once your canner is prepared, place your beans in the canner – not too tight – give them a little room – but not too loosely either – or they might fall over! If you have extra space in your canner, I recommend just canning a jar or two of water. Then you will have some extra water for emergencies, your canner will be full so that jars don’t tumble over inside while canning and you won’t have empty jars taking up space on your shelves!
Make sure the water does not cover the jar – I try to make sure that the water comes up about ½ way on my jars. Place the lid on and secure it and start heating!
Once the steam is coming out in a steady stream for 10 minutes, then place the weight on 10 and when you get a jiggle, it’s time to start timing! Beans process for 25 minutes at 10 lbs of pressure. You will need to read your canner instructions to understand how your canner will behave. We adjust the flame on our canner until the jiggler is jiggling every 20 seconds or so – not too hard.
Once the time has been reached, turn the heat off and let your canner come back to temp on its own. Then remove your jars and place in a non drafty area until they are cool. Once cooled, check all of the seals to make sure that everything sealed properly. If you press the center of the jar lid and you hear a pop – it isn’t sealed

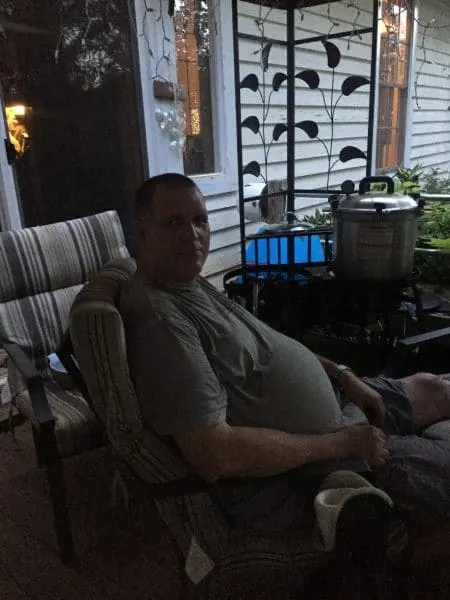
SWEET HUBBY MANNING THE CANNER WHILE THE BEANS DO THEIR THING
WHAT TO DO IF THE JAR DIDN’T SEAL PROPERLY
- Plan to have beans for supper tonight or tomorrow! Just cook them and eat them. No harm.
- You can reprocess your beans with a new lid. Perhaps something was a little wrong with the process.
When you have a jar that looks like either one of these – I think the best thing to do is to take the lid off, add enough boiling water to fill. Put a new lid on and reprocess. A CORRECT JAR WILL HAVE THE WATER COVERING THE BEANS AND WILL BE NEAR THE TOP OF THE JAR. Do not worry if you have space at the bottom of the jar and the beans are floating – this just means that you could have put more beans in the jar. Dont worry if the beans are sunk at the bottom of the jar and there is extra water at the top – this happens too – again, you could have put more beans in the jar.
These are things that happen to all of us! I have been canning for a while and have even won a BLUE RIBBON at the fair – and you see what happened to my jars below! Its not a big deal – just a trip back through the canner. No one is perfect and things happen. That doesn’t mean you can’t do this – because you can!
If you tighten the jar too tight – this buckling of the lid can happen.
IF the lid is too loose – then the water will siphon from the jar at the end of canning – my finger is pointing to the water line in the jar.
WHAT IF I HAVE QUESTIONS AND DON’T KNOW WHAT TO DO?
That is what I am here for! You can leave a message here on the site or you can email me at wendi(at sign) loavesanddishes (dot) net. I am happy to answer your questions. I am happy to facetime with you if you need me to see what you are looking at.
I want you to consider something. People all over the world preserve food this way. It can’t possibly be that difficult. Certainly YOU can figure it out and do it! (This is what I told myself when I was learning to can food!).
A VERSE TO SHARE
We have been reviewing Jesus’ sermon on the Mount. I just think it is so important for the time we are in now. My friends, we all need to know what Jesus had to say. These are His words.
“Do not store up for yourselves treasures on earth, where moths and vermin destroy, and where thieves break in and steal. But store up for yourselves treasures in heaven, where moths and vermin do not destroy, and where thieves do not break in and steal. For where your treasure is, there your heart will be also.~ Matthew 6: 19-21
")
")


")
")


Carla
Monday 16th of March 2020
Great detail . I will be canning water this year. I live in Florida and it never fails that we need to have extra water at some pointy.LOL
Wendi Spraker
Monday 16th of March 2020
Hi Carla, we keep some canned water at all times. Its an easy economical way to have water, it doesn't kill the environment with plastic bottles and it keeps your jars clean, perfect solution if you ask me.