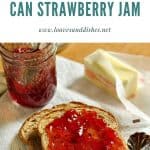
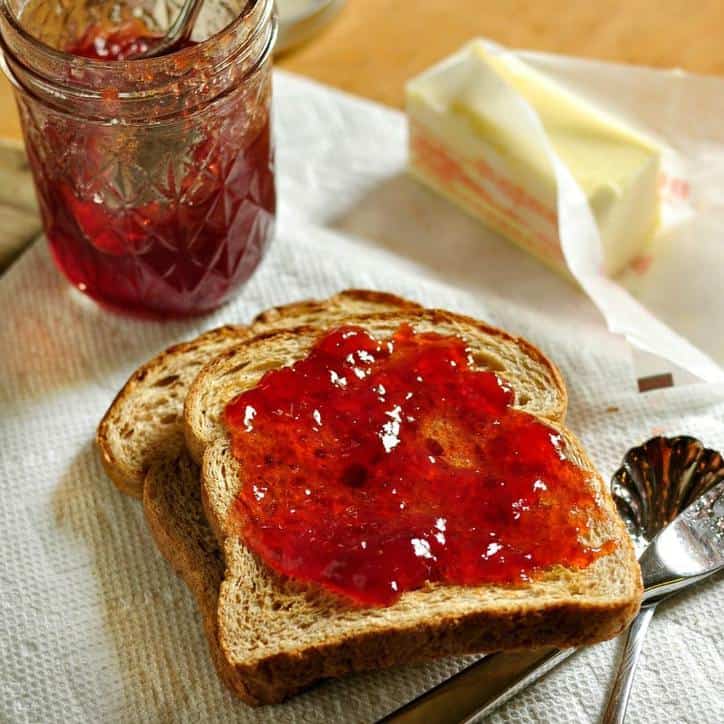
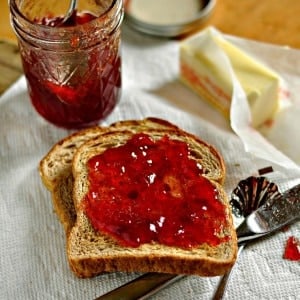
Hello sweet readers! As you know, I am SO EXCITED that it is strawberry time!! Let’s make and Can Strawberry Jam! Canning saves you money and more importantly, you will know EXACTLY what is in the food you are eating. Best of all – home canned food tastes better! It's so easy to make sure jell strawberry jam!
Today we have a complete pictorial explanation of how to make and can strawberry jam . So easy – and TASTY! As a bonus, you will see a few photos of my dear sweet hubby helping to make jam!
If You Want to See the WHOLE Process Start To Finish, Here's the Video.
Just run on over to my YouTube channel and I go through the whole process and show you every little part! Here's the video of me making strawberry jam with sure jell.
The First Thing About Canning Sure Jell Strawberry Jam...
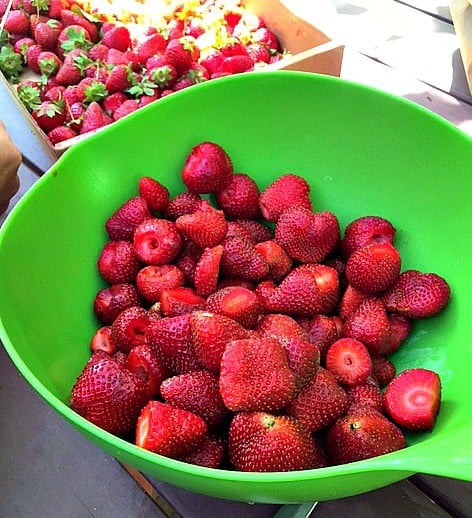
The first most important rule of making delicious strawberry jam is choosing the berries. You must start with the freshest, ripest, juiciest and most flavorful berries that you can find.
Where I live, there are strawberry farms and that is the place to go! Simply call ahead and reserve the number of gallons desired.
Conversely, the strawberry farm has a roadside stand and one can simply drive up and see what is available – but since canning is a big deal at my house, I like to call ahead and make sure that I have my order in for the day.
These Directions Are For A Single Batch of Jam.
The directions here are for making a single batch of jam –your large stock pot at home will work just fine.
In the photos, Mark and I are making multiple batches at one time and this requires some large cooking vessels.
Regarding canners: You will need a water bath canner for making strawberry jam. If you do not have a water bath canner – you can still make jam – you simply make it in a large stock pot. As long as the water will cover your jars by 1”, you can do it! Here is the water bath canner that I use:
The only thing that an official water bath canner has that your stock pot does not is a special wrack for the jars. You can make one that serves the same purpose.
The idea is that you don’t want the jars bumping against the bottom of the pot while they boil.
To Make Your Own Rack for the Canner...
To remedy this, you can wire some canning rings together with bread ties – form into a circle that will fit in the bottom of the pot.
If this is not possible, you can place a thick kitchen towel (folded in half or quarters) in the bottom of the pot. I have done both of these methods and either works well.
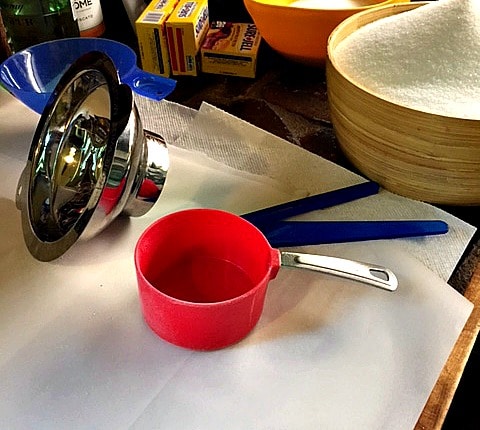
Special Tools for Canning....
Finally, there are some special tools that make the job A LOT EASIER – not required – but I certainly recommend them – here is a link – you can probably find the same thing in your local grocery store.
If you are not interested in purchasing special tools – see the suggested substitutes listed below in step 7.
The photo below is an affiliate link and I am an Amazon Affiliate, you can click the photo to go straight through to Amazon to compare prices. If you make a purchase, Loaves and Dishes will receive an affiliate commission, so, thank you!

Other items you will need:
- Damp Paper towels,
- Ladle,
- Timer,
- slotted spoon,
- a stand mixer
- OR a glass pie plate and a potato masher.
With that, let’s jump in!
Ingredients:
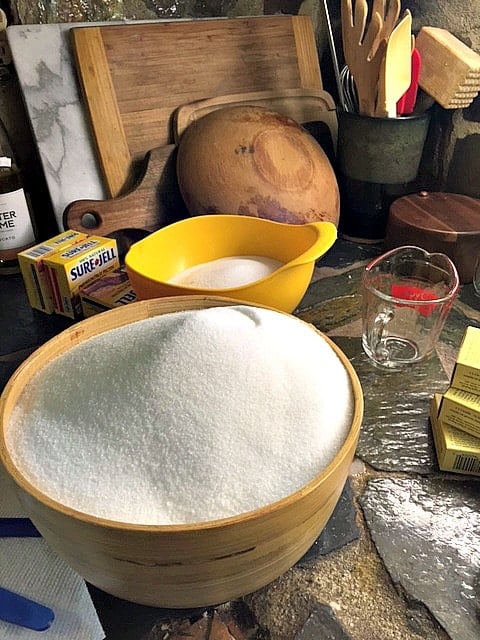
- 7 Cups of Granulated Sugar
- 5 Cups of crushed strawberries (about 8 cups of whole berries – or about a gallon).
- 4 Tbs lemon juice
- 1 package of regular powdered fruit pectin (1.75 oz/49-57g).
Instructions
STEP 1.
- Purchase and/or pick your strawberries for your strawberry jam.
- Purchase or locate your jam jars, rings and lids.
- You will need about a Gallon of strawberries to make a single batch of Jam and each batch yields about 8-10 jam jars.
- Please only use jars designed for canning.
- Do not reuse old spaghetti sauce jars, mayonnaise jars, etc.
- These are not made for canning and could break or not seal properly. Believe me, that would be a MAJOR bummer.
STEP 2.
- Wash the jars and make sure they are completely sanitized.
- Personally, I run them through the dishwasher, and if you time things just right so that you are ready to fill the jars just as the washer is complete – then you don’t have to heat the jars as you will see in a future step!
- At my house, this means turning the dishwasher on just as I am getting ready to top the strawberries – it could be different at your house.
STEP 3.
- Set the large pot you will use as your water bath canner on the stove – filled ½ - ¾ with water.
- Set heat on high.
- Place top on the pot and keep an eye on this while you complete the other steps.
- If it starts to boil, turn down temp so that it keeps a small simmer while you work. (
- This way it will be easy to return to a boil when you are ready to start canning)
- Keep the lid on so that you do not lose too much water to evaporation.
STEP 4.
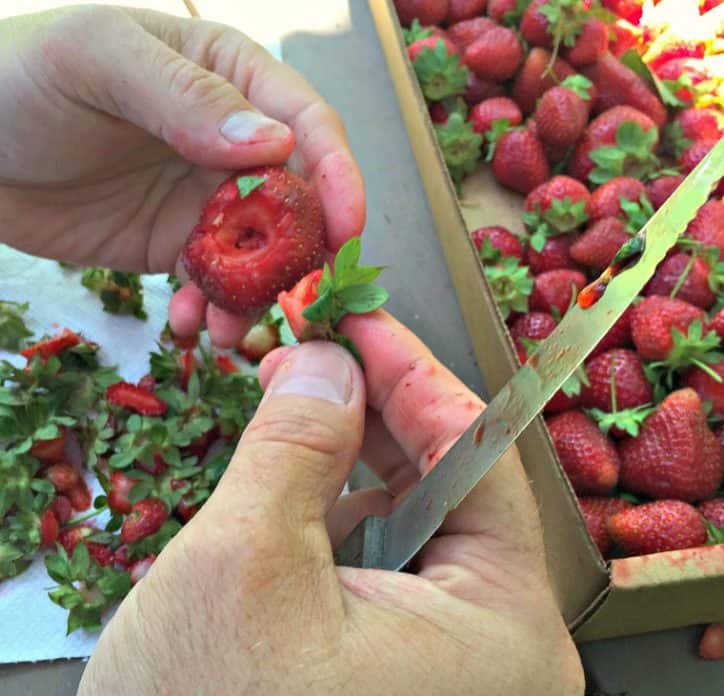
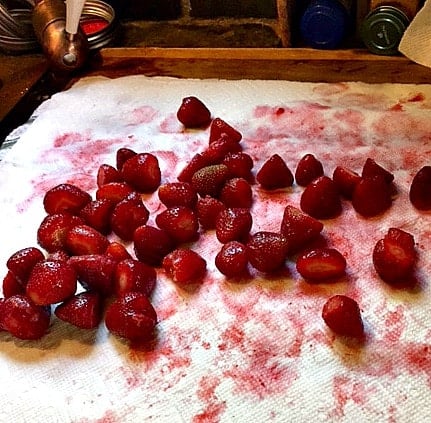
- Top your strawberries and cut the little white core out of the strawberries.
- See how Mark does here?
- If the strawberry is mostly red all the way through, you can skip the coring part.
- The core won’t hurt you but it can leave some funny colored bits in your final jam – unappetizing! sure jell strawberry jam.
STEP 5.
- Wash the strawberries and then make sure they are as dry as possible.
- You can see that we place them on layers of paper towels and then also blot them dry with more paper towels.
- Be gentle, you don’t want to bruise them or squeeze any delicious juice out!
STEP 6.
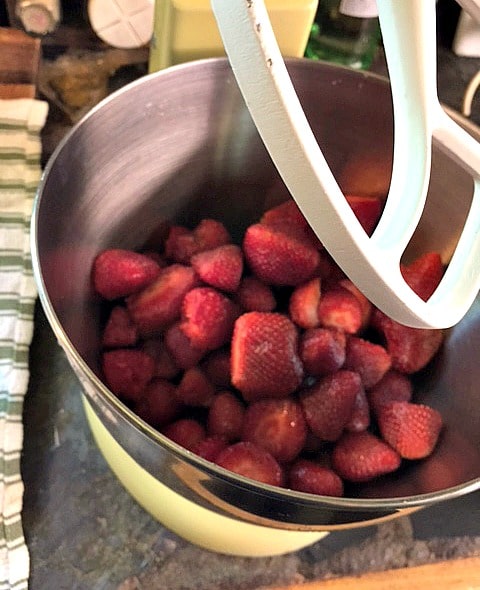
- You will see in the picture that I am using my kitchenaid to smash the berries.
- If you do not have a kitchen aid, don’t worry – you don’t need one.
- For years, I made my jam with a potato masher – and that is all that you really need.
- Simply place the berries in a glass bottomed pie plate and using a potato masher – mash the berries until they are a consistency that you like for your jam.
- You can see in the photo the consistency of my berries – mine are more juice than berry when I am done – but there are still pieces of berry floating in there.
- Smash the berries until you have 5 Cups of smashed berries (this roughly equals 8 cups of berries).
- Set the berries aside for a moment while you prepare everything else.
- Add the lemon juice.
- (Use the store bought lemon juice because it has a consistent acid level – which is needed for the safety of what you are canning. Lemons acid level varies).
STEP 7.
- This is a recipe that requires that you get everything out and ready to go before you start cooking. Measure out your sugar (7 cups – which is almost an entire 4lb bag of sugar).
- Open your Sure-Jell packet and place it where it will not spill.
- Make sure your jars are ready (hot and clean).
- If your jars are already clean but need to be heated, you can do this one of several ways. The Ball Book suggests placing the jars in the canner of boiling water and allow to boil until you are ready to use.
- I have found it easier to set the jars on a large cookie sheet, set the oven on 130 or so and then place the jars in the oven.
- The idea is that you want the jars to be hot when you are ready to ladle the hot lava like jam into the jars so as not to break them with the great temperature differences.
STEP 8.
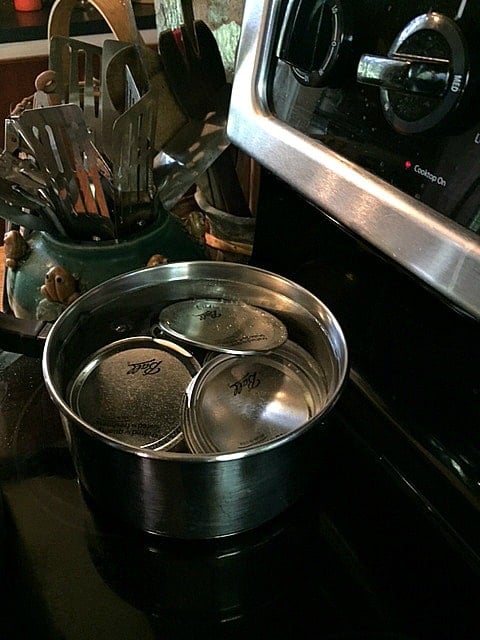
- Place the lids in a small sauce pan and cover with water – place on the stove and set to medium low. You want the lids to heat but not to boil.
- Make sure to have all of your canning tools ready to go: Damp Paper towels, Ladle, Timer, Jar lifter, head space tester, bubble remover (same as head space tester if you have the same tools that I have), funnel, slotted spoon and magnet for the lids
- If you don’t have these items, you can make due with tongs (jar lifter), plastic ruler (head space tester), plastic knife (bubble remover) and tongs (to remove lids from the boiling water).
- However, I really recommend having these basic items as it makes the job so much easier.
- A note about your counter top. Strawberry jam is STICKY!
- I always put down a couple of layers of paper towel or kitchen towel and then cover that with parchment paper. Makes for a much easier clean up! You are going to have drips.
STEP 9.
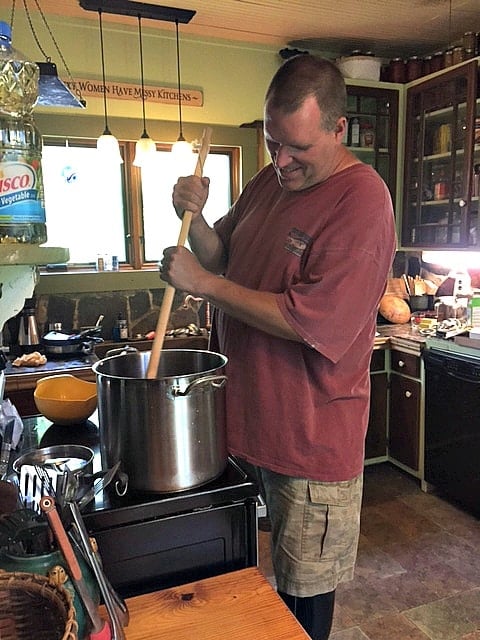
- We are ready to cook the jam!
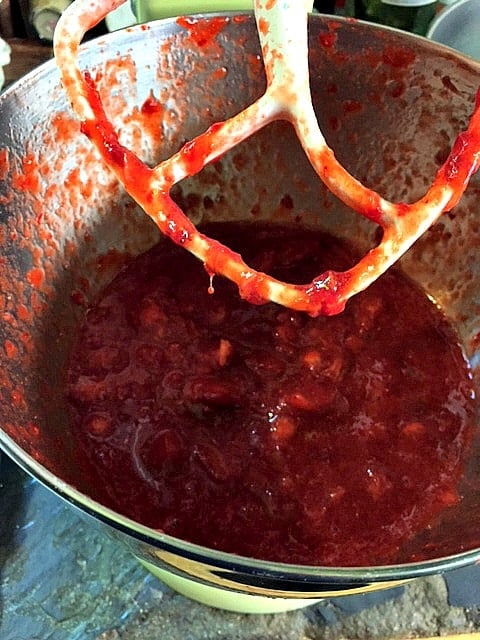
- Take your 5 cups of smashed berries and whisk in the package of Sure-Jell. Stir, stir stir. Sure Jell Strawberry Jam
- Set the stove top on high heat. Stir frequently and cook the berries until they come to a full boil.
- While boiling, add the sugar all at once. Then stir stir stir – don’t stop until you are certain that all of the sugar has dissolved. (the berry mixture may kind of puff and swell initially when you add the sugar – this is ok and to be expected).
- Stir frequently until the berry mix comes to a full rolling boil that can not be stirred down. Once they are at the full boil stage – set your timer for one minute and keep stirring/boiling for a full minute.
STEP 10
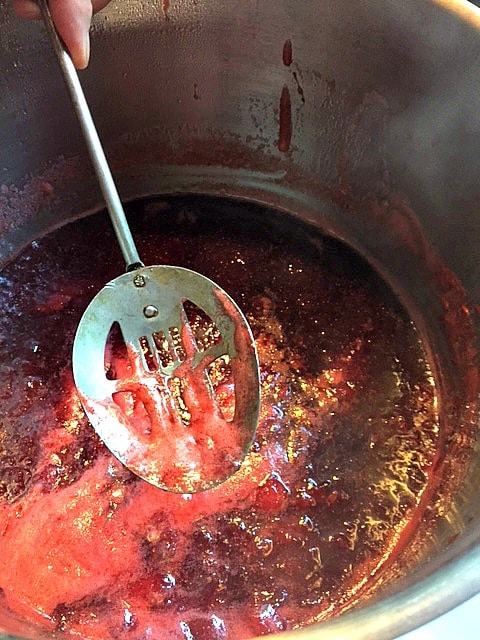
- After a full minute of boiling, remove the pan from the heat and stop stirring.
- Allow your jam to rest for a minute or two and you will see that foam rises to the top.
- Using a slotted spoon, skim off as much foam as you can. (The foam won’t hurt you or affect the taste of the jam – but it does form a hard little white spot on the top of your jam and affects how the jam looks).
- At this point, you now have jam!! Congratulations!!
STEP 11
- Once the foam is removed, ladle the hot jam into the hot jars using the jar funnel. (Its time to turn your canner back up to full boil as well).
- Leave ¼ inch of space between the top of the jar and the jam.
- Add or remove jam to make this correction.
- Using the plastic knife or the bubble remover, gently poke down to the bottom of each jar several times to remove any bubbles. You will need to check the head space again after removing bubbles and add or remove jam as needed.
- Wipe the rims of each jar with a damp paper towel to remove any drips of jam.
- Place the lids on the jars – seal side down on the jar and then place the ring and twist until it is “finger tip tight”.
- This mean, tight enough so as not to be loose – but loose enough that it doesn’t require any strain to remove the ring.
- (You want air to be able to escape from the jar after the jar has gone through the canner so that it will create the proper seal).
STEP 12.
- Place the jars into your canner, using care so as not to break any. Lower the jars into the hot water and make sure that they are covered by at least 1 " of water.
- Place the lid on the canner. When the water returns to a boil, set your timer for 10 minutes.
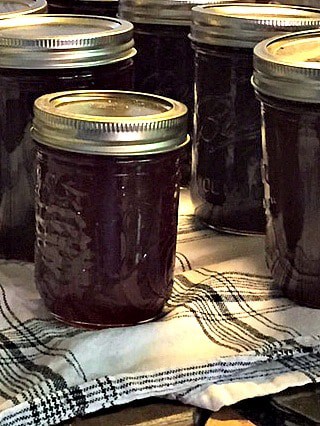
- After 10 minutes, turn off the heat. Remove the jars from the water bath and place onto a clean kitchen towel in a place that is free from a draft.
- Evenly space the jars, cover with a damp kitchen towel and allow to cool.
- You will hear the jar lids pop as they finish their seal.
- The most satisfying sound in the world.
- Do not disturb the jars for 24 hours.
- Although it is tempting, do not pick the jars up to check them or to examine them. Wait 24 hours.
- After 24 hours, label your jars (with labels or write on the jar lid) with the name of the contents, date and year (Strawberry Jam 5/25/2015). Your jam is best if used in the first 6 months. I have used my jam after more than a year in storage and it has been just fine though.
Ya'll Help Me Out, OK?
Please leave a 5 STAR comment in the comment section below. This helps others find the recipes at Loaves and Dishes!
How to make and can Strawberry Jam
Ingredients
- 7 Cups of Granulated Sugar
- 5 Cups of crushed strawberries about 8 cups of whole berries – or about a gallon.
- 4 Tbs lemon juice
- 1 package of regular powdered fruit pectin 1.75 oz/49-57g.
Instructions
- Purchase and/or pick your strawberries. Purchase or locate your jam jars, rings and lids. You will need about a Gallon of strawberries to make a single batch of Jam and each batch yields about 8-10 jam jars. Please only use jars designed for canning. Do not reuse old spaghetti jars, mayonnaise jars, etc. These are not made for canning and could break or not seal properly. Believe me, that would be a MAJOR bummer.
- Wash your jars and make sure they are completely sanitized. Personally, I run them through the dishwasher, and if you time things just right so that you are ready to fill the jars just as the washer is complete – then you don’t have to heat the jars as you will see in a future step! At my house, this means turning the dishwasher on just as I am getting ready to top the strawberries – it could be different at your house.
- Set the large pot you will use as your water bath canner on the stove – filled ½ - ¾ with water. Set heat on high. Place top on the pot and keep an eye on this while you complete the other steps. If it starts to boil, remove lid and turn down temp so that it keeps a small simmer while you work. (This way it will be easy to return to a boil when you are ready to start canning)
- Top your strawberries and cut the little white core out of the strawberries. See how Mark does here? If the strawberry is mostly red all the way through, you can skip the coring part. The core won’t hurt you but it can leave some funny colored bits in your final jam – unappetizing!
- Wash your strawberries and then make sure they are as dry as possible. You can see that we place them on layers of paper towels and then also blot them dry with more paper towels. Be gentle, you don’t want to bruise them or squeeze any delicious juice out!
- You will see in the picture that I am using my kitchenaid to smash the berries. If you do not have a kitchen aid, don’t worry – you don’t need one. For years, I made my jam with a potato masher – and that is all that you really need. Simply place the berries in a glass bottomed pie plate and using a potato masher – mash the berries until they are a consistency that you like for your jam. You can see in the photo the consistency of my berries – mine are more juice than berry when I am done – but there are still pieces of berry floating in there. Smash the berries until you have 5 Cups of smashed berries (this roughly equals 8 cups of berries). Set the berries aside for a moment while you prepare everything else. Add the lemon juice. (Use the store bought lemon juice because it has a consistent acid level – which is needed for the safety of what you are canning. Lemons acid level varies).
- This is a recipe that requires that you get everything out and ready to go before you start cooking. Measure out your sugar (7 cups – which is almost an entire 4lb bag of sugar). Open your Sure-Jell packet and place it where it will not spill. Make sure your jars are ready (hot and clean). If your jars are already clean but need to be heated, you can do this one of several ways. The Ball Book suggests placing the jars in the canner of boiling water and allow to boil until you are ready to use. I have found it easier to set the jars on a large cookie sheet, set the oven on 130 or so and then place the jars in the oven. Your choice. The idea is that you want the jars to be hot when you are ready to ladle the hot lava like jam into the jars so as not to break them with the great temperature differences. Place the lids in a small sauce pan and cover with water – place on the stove and set to medium low. You want the lids to heat but not to boil. Make sure to have all of your canning tools ready to go: Damp Paper towels, Ladle, Timer, Jar lifter, head space tester, bubble remover (same as head space tester if you have the same tools that I have), funnel, slotted spoon and magnet for the lids If you don’t have these items, you can make due with tongs (jar lifter), plastic ruler (head space tester), plastic knife (bubble remover) and tongs (to remove lids from the boiling water). However, I really recommend having these basic items as it makes the job so much easier.
- Canning water is boiling, Jars are clean and heating or hot, jar lids are heating and all of the tools are clean and ready to use. We are ready to cook the jam! Take your 5 cups of smashed berries and whisk in the package of Sure-Jell. Stir, stir stir. Set the stove top on high heat. Stir frequently and cook the berries until they come to a full boil. While boiling, add the sugar all at once. Then stir stir stir – don’t stop until you are certain that all of the sugar has dissolved. (the berry mixture may kind of puff and swell initially when you add the sugar – this is ok and to be expected). Stir frequently until the berry mix comes to a full rolling boil that can not be stirred down. Once they are at the full boil stage – set your timer for one minute and keep stirring/boiling for a full minute.
- After a full minute of boiling, remove the pan from the heat and stop stirring. Allow your jam to rest for a minute or two and you will see that foam rises to the top. Using a slotted spoon, skim off as much foam as you can. (The foam won’t hurt you or affect the taste of the jam – but it does form a hard little white spot on the top of your jam and affects how the jam looks).
- Once the foam is removed, ladle the hot jam into the hot jars using the jar funnel. (Its time to turn your canner back up to full boil as well). Leave ¼ inch of space between the top of the jar and the jam. Add or remove jam to make this correction. Using the plastic knife or the bubble remover, gently poke down to the bottom of each jar several times to remove any bubbles. You will need to check the head space again after removing bubbles and add or remove jam as needed. Wipe the rims of each jar with a damp paper towel to remove any drips of jam. Place the lids on the jars – seal side down on the jar and then place the ring and twist until it is “finger tip tight”. This mean, tight enough so as not to be loose – but loose enough that it doesn’t require any strain to remove the ring. (You want air to be able to escape from the jar after the jar has gone through the canner so that it will create the proper seal).
- Place the jars into your canner, using care so as not to break any. Lower the jars into the hot water and place the lid on the canner. When the water returns to a boil, set your timer for 10 minutes. After 10 minutes, turn off the heat. Remove the jars from the water bath and place onto a clean kitchen towel in a place that is free from a draft. Evenly space the jars, cover with a damp kitchen towel and allow to cool. You will hear the jar lids pop as they finish their seal. The most satisfying sound in the world. Do not disturb the jars for 24 hours. Although it is tempting, do not pick the jars up to check them or to examine them. Wait 24 hours. After 24 hours, label your jars (with labels or write on the jar lid) with the name of the contents, date and year (Strawberry Jam 5/25/2015). Your jam is best if used in the first 6 months. I have used my jam after more than a year in storage and it has been just fine though.
Notes
- You will want to use the freshest and best strawberries that you can find.
- Fresh ripe berries have red all the way through and very little white core.
- Once strawberries are actually ripe, you need to use them within one to two days.
- Avoid strawberries that have a large white core, that don't smell fresh or are significantly bruised.
- Cut off any areas that are bruised or bad.
Nutrition
***This post originally appeared on the pages of Loaves and Dishes on May 26, 2015 and has been updated with step by step instructions, new affiliate links, updated photo descriptions, video, recipe card, equipment, nutrition and instructions***
A VERSE TO SHARE
Even when I feel that God is nowhere in sight, I find that he leads and guides me if I will JUST listen. Listening is often difficult.
Matthew 6: 28-34
And why do you worry about clothes? See how the flowers of the field grow. They do not labor or spin. Yet I tell you that not even Solomon in all his splendor was dressed like one of these. If that is how God clothes the grass of the field, which is here today and tomorrow is thrown into the fire, will he not much more clothe you—you of little faith? So do not worry, saying, ‘What shall we eat?’ or ‘What shall we drink?’ or ‘What shall we wear?’ For the pagans run after all these things, and your heavenly Father knows that you need them. But seek first his kingdom and his righteousness, and all these things will be given to you as well. Therefore do not worry about tomorrow, for tomorrow will worry about itself. Each day has enough trouble of its own
")

")

Lareena says
Can I use realfruit classic pectin and how much for a batch? I don’t have the packets.
Wendi Spraker says
Hi Lareena, I haven't used this before. I'm just going to have to say, use whatever the instructions on the package say to use.
Barbara says
I am happy to have found your instructions. Most of your recommendations were spot on. I have never dried my strawberries and not sure why you would do that. One other thing is that I keep stirring after the batch starts to thicken and drip a drop of mixture into a glass of cold water. If it doesn't spread, I know it's thick enough to put into jars. Your instructions about running a knife down the jam in jar before putting on lids is something I will start doing as it makes perfect sense.
Thank you for the pictures and instructions and especially creating a page that allows one to jump to the instructions/and or print. Fabulous recipe directions. thank you.
Wendi Spraker says
Hi Barbara, It's probably negligible but I don't want to add any extra water to the process than is already necessary. The water has to cook off and it can cause some foaming. Enjoy your jam!
John young says
My first time canning I am retired ( 79 ) and looking for things to do this seemed reasonable and it was . Thank you so much .
Wendi Spraker says
It's always a great day to learn something new! If I can be of any further help, please let me know!
Ashley says
We brought home a couple gallons of berries from our local orchard so I decided to try making and canning jam for the first time. Your step by step directions were perfectly clear and easy to follow. The jam tasted delicious! This will now be something I do each year! Thank you!
Wendi Spraker says
So glad I made it easy! It took me a while to figure it out and that's why I wanted to post the instructions. Thanks!