
THE SECRET TO PERFECT SOUTHERN BISCUITS. Do you want a crunchy top? Do you want a soft flaky inside? Do you want buttery flavor for your perfect southern biscuits? Yes? Perfect!
You know that Loaves and Dishes is ALL ABOUT biscuits, southern food, comfort food and food that feeds the soul. I've shown you these Sweet Potato Biscuits and I've shown you how to improve canned biscuits. I've shown you my recipe for Southern Buttermilk Biscuits. Some of you continue to say, "I just don't know the SECRET to perfect southern biscuits. We will fix that today.
Follow these 12 steps (Plus one Pro Tip) and you won’t go wrong in making the perfect southern biscuit. It is VERY important that you follow each direction closely.
12 STEPS TO PERFECT SOUTHERN BISCUITS (+1 PRO TIP)
INGREDIENTS for THE SECRET TO PERFECT SOUTHERN BISCUITS
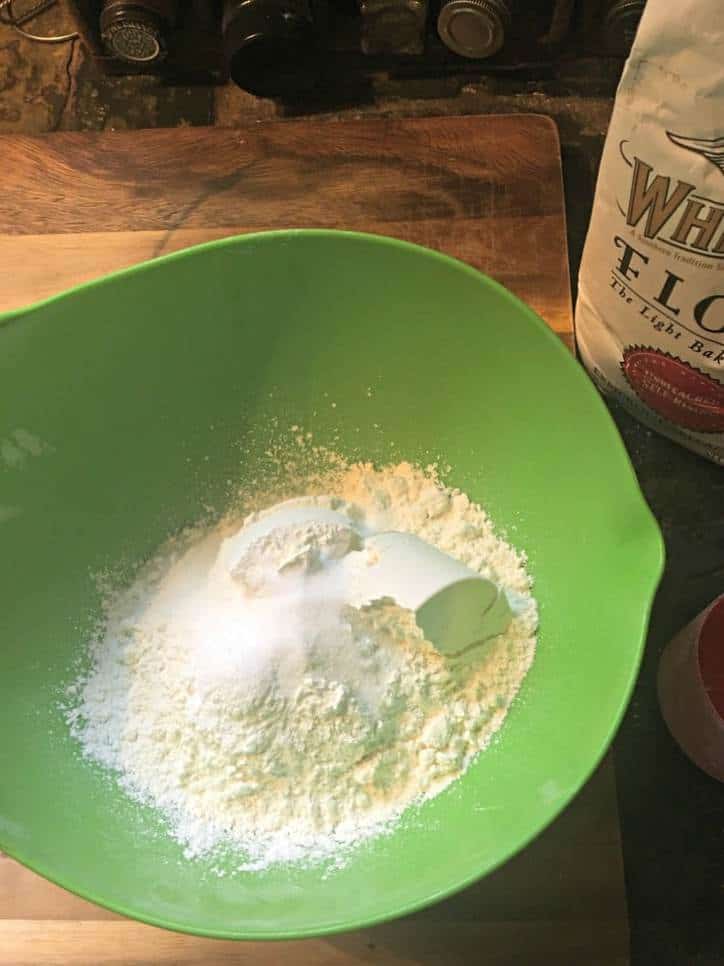
- USE THE RIGHT FLOUR
It is important to use the right flour to make the perfect Southern Biscuit. Personally, I’ve tried at least 6 different flours and while I have had a 30 year obsession with a different kind of flour, White Lily Self Rising Flour is the BEST for making biscuits.
Only use the White Lily Soft Winter Wheat Self Rising flour (and they aren’t paying me to say that) because that soft winter wheat makes your biscuit dough soft and pliable. As a result, your biscuits will turn out lifeless, hard and hockey-puckish if you don’t.
Here is what I’m talking about - CLICK THE PHOTO it is an affiliate link and you can click straight through to Amazon to have it shipped to you if you don’t have it available to you in the grocery.

2. USE THE RIGHT FAT
It is super important to use the right fat in your biscuit. It is especially true to this fat if you are new at making biscuits. Use Crisco. I know. I know. I like to use all natural fats like butter myself because that is what I preach.
However, if you are new to making biscuits, I want you to be a success and want you to use what is easiest to use. Therefore, use Crisco.
This photo is an affiliate link and you can use it to click straight through to Amazon.

EQUIPMENT for THE SECRET TO PERFECT SOUTHERN BISCUITS
3. USE THE RIGHT EQUIPMENT
Do NOT try to mix the biscuit dough up with your hands. In fact, you want to touch the dough as little as possible.
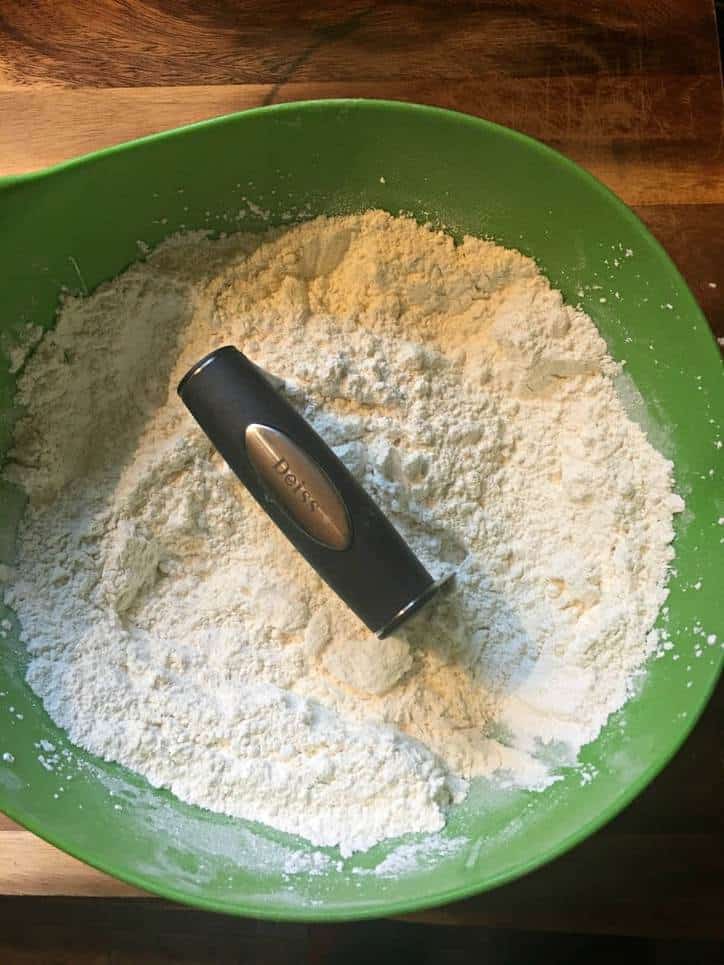
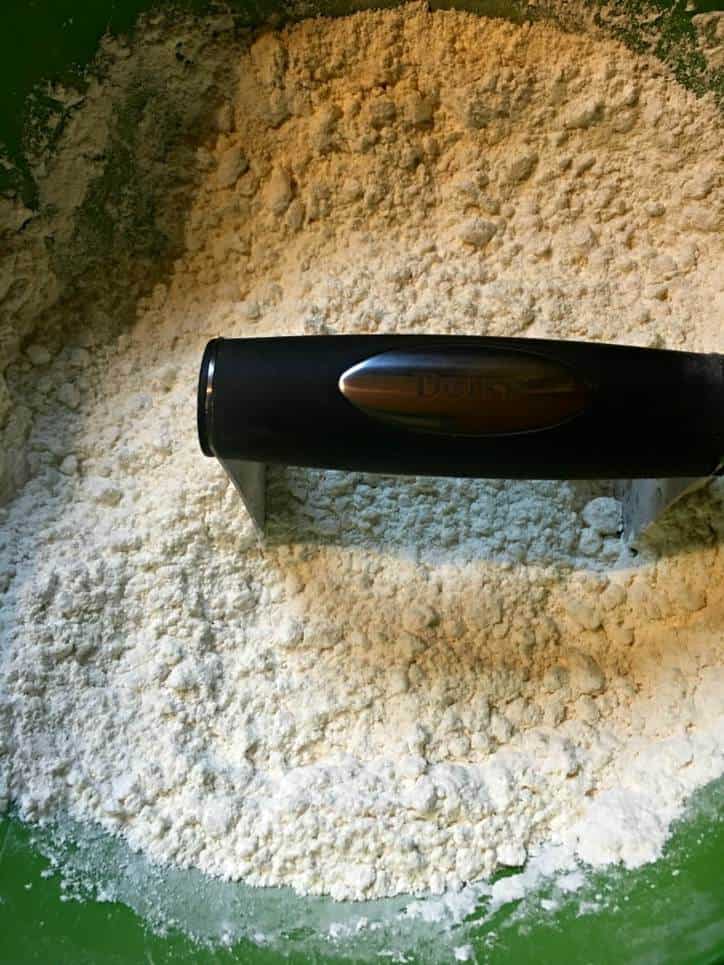
When cutting in the Crisco - use a pastry cutter like the one pictured. I only use Deiss tools in my kitchen (and they aren’t paying me to say that - although they did give me this particular pastry cutter - I’ve been using Deiss for well over a year and everything has held up to my kitchen abuse).
Mix the ingredients together with a rubber spatula until it just comes together and then turn it out on a floured board and knead a few times.

4. USE THE PASTRY CUTTER AS FOLLOWS:
Use the pastry cutter in both a chopping motion and rocking back and forth over the top of the fat. This cuts the fat into small pieces.
Therefore, the flour starts to look a little clumpy. When it seems like the clumps are mostly pea sized and the flour has started to look coarse, stop. You are finally done.
5. KEEP EVERYTHING COLD UNTIL READY TO USE
Keep your flour and crisco and milk in the fridge until you are ready to use them because cold ingredients help the fat (Crisco) to stay cold. The fat in the mix is what expands during baking to make soft little crunchy pockets in your biscuits!
TECHNIQUE for THE SECRET TO PERFECT SOUTHERN BISCUITS
6. TOUCH THE DOUGH WITH YOUR HANDS AS LITTLE AS POSSIBLE
The fat in the biscuit will melt from just the temperature of your hands so touch the biscuits with your hands as little as possible. When kneading, only knead a few times until the dough feels buttery soft.
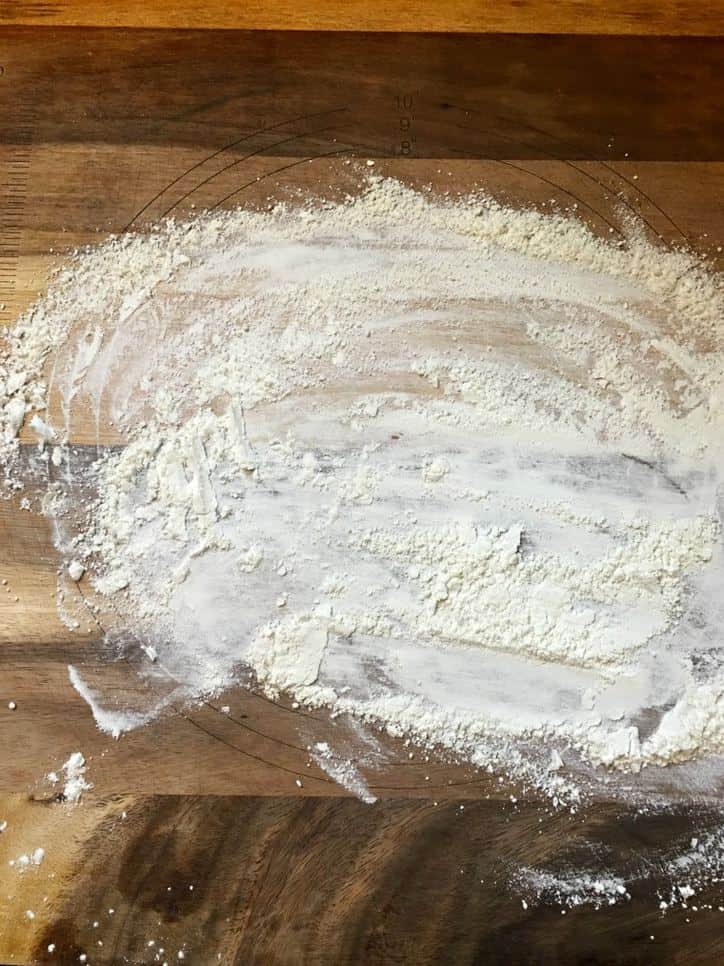
7. DO NOT OVER FLOUR THE BOARD OR THE DOUGH
Only use enough flour to keep the dough from sticking because adding too much can make the dough tough.
8. DO NOT OVER KNEAD (OVER WORK) THE DOUGH
Kneading the dough (doubling it over on itself) a few times is all that is needed to make biscuits perfectly.
STYLE for THE SECRET TO PERFECT SOUTHERN BISCUITS
9. MELT BUTTER IN THE BOTTOM OF YOUR RIMMED PAN
For a buttery crunchy bottom crust, melt butter into your rimmed half sheet pan as your oven comes to temp but be very careful not to burn the butter.
The butter should be bubbly and sputtering when you remove the pan from the oven then work quickly and put the biscuits onto the pan and return it to the oven.
10. CUT THE BISCUITS STRAIGHT DOWN WITH THE CUTTER
Do not twist your cutter as you cut the biscuits jug push the cutter straight down through the dough because this allows the biscuits to expand properly in the pan as they bake.
PAINT EVERYTHING for THE SECRET TO PERFECT SOUTHERN BISCUITS
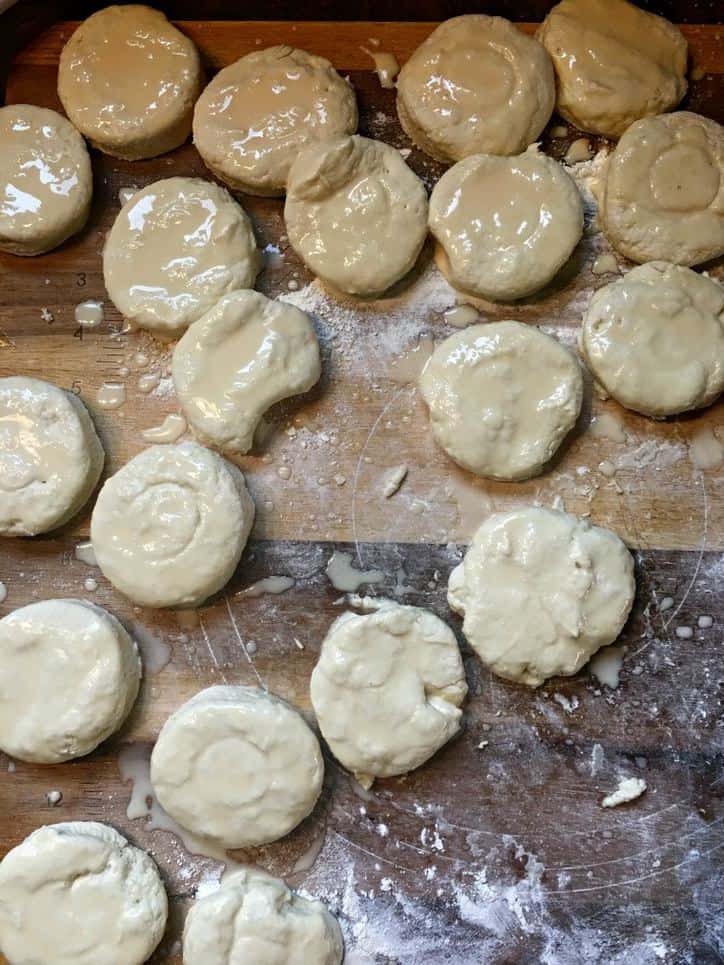
11. PAINT THE BISCUIT TOPS WITH EVAPORATED MILK
For a crunchy top crust, paint the tops of the biscuits with evaporated milk before baking. Just work quickly and paint it on because this makes an unbelievably crunchy top.
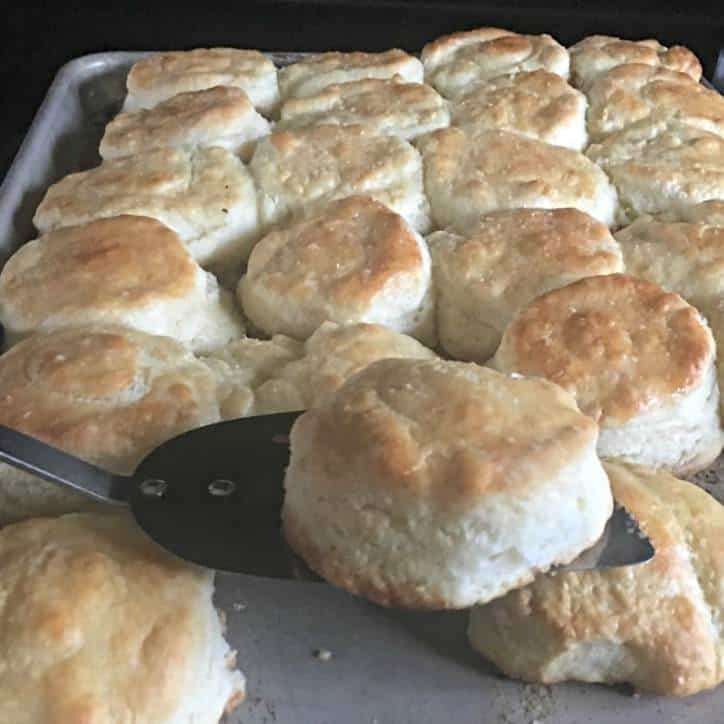
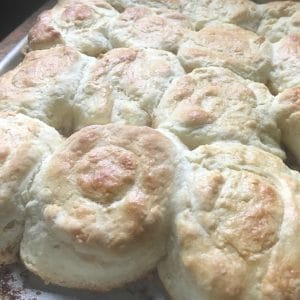
12. PAINT THE BISCUIT TOPS WITH BUTTER AFTER BAKING
For that buttery crunchy top crust, make sure to paint the biscuit tops with melted butter as soon as they come out of the oven. As a result, you won’t be sorry.
PRO TIP for THE SECRET TO PERFECT SOUTHERN BISCUITS
SPRINKLE A PINCH OF KOSHER SALT IN THE PAN BEFORE BAKING AND AGAIN AFTER PUTTING BUTTER ON THE TOPS.
Because adding a pinch of salt both times gives a tiny bit more flavor. You won’t be sorry. Only a tiny sprinkle.
PHOTO INSTRUCTIONS FOR THE SECRET TO PERFECT SOUTHERN BISCUITS
IF YOU ENJOYED THE SECRET TO PERFECT SOUTHERN BISCUITS, YOU MIGHT ALSO ENJOY:
The Secret to Perfect Old Fashioned Pinto Beans
The Secret to Perfect Southern Collard Greens
The Secret to Perfect Southern Sweet Tea
The Secret to Perfect Southern Fried Apples
The Secret to Perfect Chicken Fried Steak
The Secret to Perfect Southern Biscuits
Ingredients
- 4 Cups Self Rising Flour White Lily Soft Winter Wheat plus extra for dusting the bread board and for kneading.
- 1 tablespoon Baking Powder
- 1 teaspoon Granulated white sugar
- 1 ½ teaspoon Kosher salt divided
- ⅔ Cups Crisco Shortening
- 2 Cups Very Cold Buttermilk
- ⅓ Cup Evaporated Milk
- 2 tablespoon unsalted sweet cream butter - melted
- 6 tablespoon unsalted sweet cream butter - divided
Instructions
- Preheat the oven to 425 degrees. That's super hot!
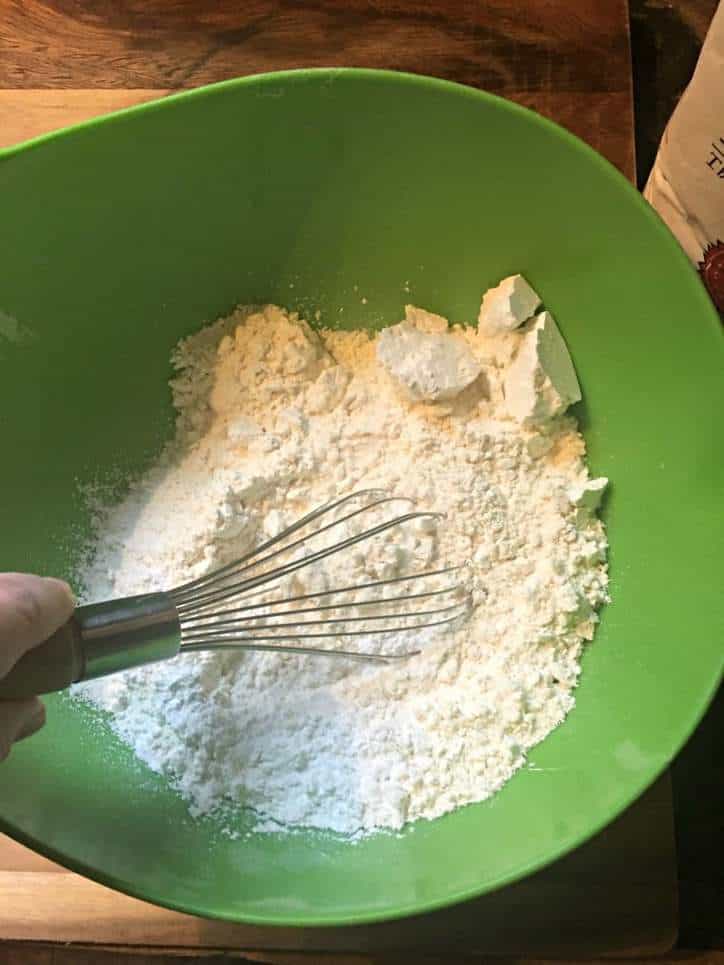
- In a large mixing bowl, mix the flour, baking powder, sugar and a ½ teaspoon salt together with a whisk. The whisk helps mix things very well.
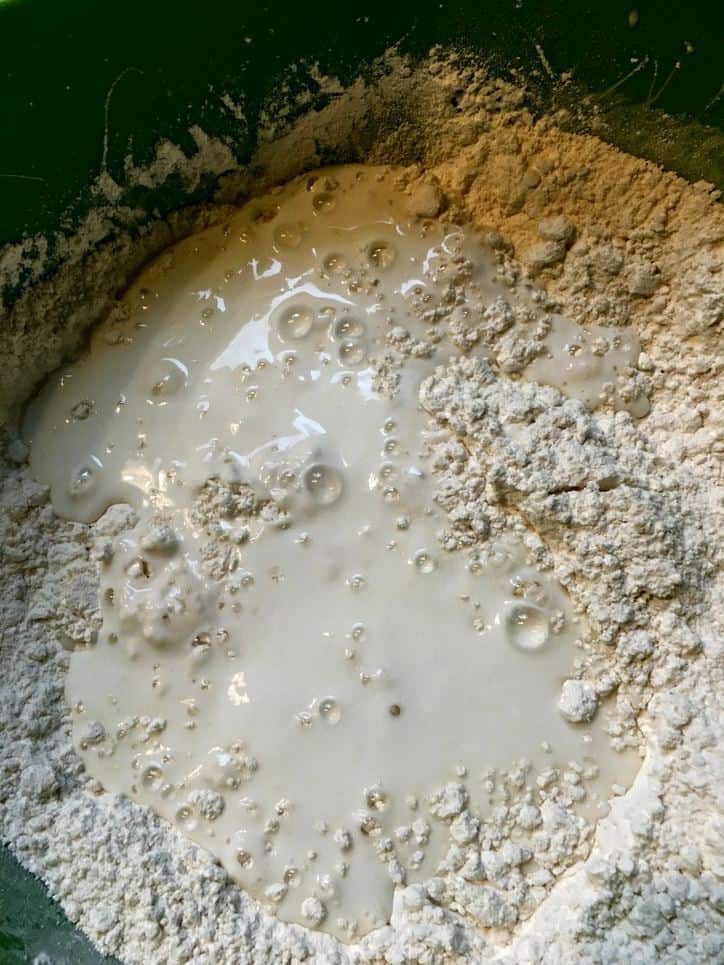
- Drop the Crisco into the flour mixture and use a pastry cutter to cut the crisco into the dry ingredients. Rock the cutter and make chopping motions until the crisco is in small pieces and the flour has a wet clumpy appearance throughout (see photo). Do NOT use your hands to mix the crisco in.
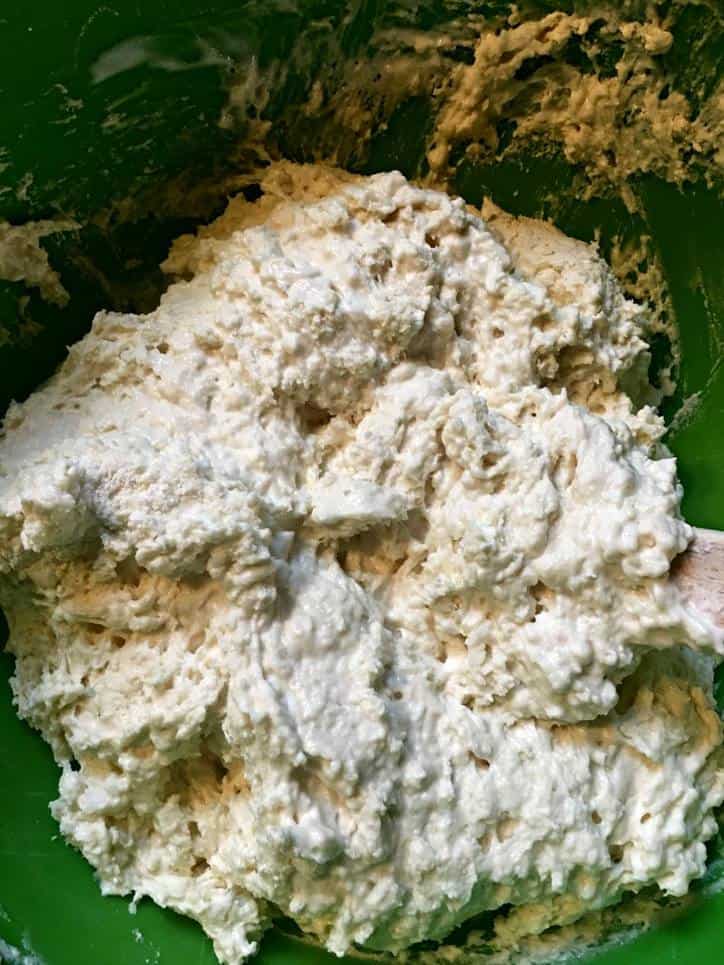
- Keep the buttermilk in the fridge until ready to use. Add the buttermilk all at once and mix together with a rubber spatula until it just comes together.
- Place ½ a stick of butter (4 Tbsp) in a rimmed half sheet pan (jelly roll pan) and allow it to melt in the oven as the oven comes to temp. Do not allow the butter to burn. You will hear it bubbling probably. The butter should be melted and bubbly (but not black) by the end of the next 3 steps.
- Turn the dough out onto a floured surface (it will be very wet looking) and sprinkle the surface with a small amount of flour. Knead the dough by folding it over on itself about 6-8 times. Sprinkle on enough flour as you go to keep it from sticking to the board. It is going to stick to your hands a little no matter what you do. The dough should feel soft and smooth when it is ready.
- Using your hands pat and press the dough down into a flat circle that is 1” thick (no need to use a rolling pin).
- Cut the biscuits using a biscuit cutter and cut in a straight motion down towards the counter. DO NOT twist the cutter. Remove the hot buttered pan from the oven. Sprinkle half of the remaining salt onto the hot buttered pan.
- Gently lay the cut biscuits onto the hot pan into the butter. The biscuits may touch one another. Put the biscuits in the pan quickly so as to return the pan to the oven as quickly as possible. Brush the tops of the biscuits with evaporated milk using a pastry brush. Sprinkle some of the rest of the salt over the tops of the biscuits. Return the pan to the hot oven. Shut the oven door and DO NOT open it again for at least 10 minutes.
- Bake biscuits for 18-25 minutes. The biscuits are done when they are golden brown and risen.
- On removing the biscuits from the oven, brush with hot melted butter. This recipe will yield 18-24 biscuits.
Notes
Nutrition
A VERSE TO SHARE
I think it is so interesting that my Bible says that the following verses are not included in the earliest manuscripts of the Bible. Finally, it also says that other ancient witnesses do not include these verses, seems like they would.
Why would that be? I am not really sure. Therefore, I just thought I would point that out. Hence, you can be the judge for yourself.
Mark 16: 9-20
When Jesus rose early on the first day of the week, he appeared first to Mary Magdalene,out of whom he had driven seven demons. She went and told those who had been with him and who were mourning and weeping. When they heard that Jesus was alive and that she had seen him, they did not believe it.
Afterward Jesus appeared in a different form to two of them while they were walking in the country. These returned and reported it to the rest; but they did not believe them either.
Later Jesus appeared to the Eleven as they were eating; he rebuked them for their lack of faith and their stubborn refusal to believe those who had seen him after he had risen.
He said to them,
“Go into all the world and preach the gospel to all creation. Whoever believes and is baptized will be saved, but whoever does not believe will be condemned.And these signs will accompany those who believe: In my name they will drive out demons;they will speak in new tongues; they will pick up snakes with their hands; and when they drink deadly poison, it will not hurt them at all; they will place their hands on sick people, and they will get well.”
After the Lord Jesus had spoken to them, he was taken up into heaven and he sat at the right hand of God. Then the disciples went out and preached everywhere, and the Lord worked with them and confirmed his word by the signs that accompanied it.
and, first of all, also, another, furthermore, finally, in addition


Connie Dtrong says
I am excited about trying your recipe for your southern biscuits Wendy.I will let you know how they turn out.
Wendi Spraker says
Great! Can't wait to hear!
Amber says
Get rid of this junk Crisco and use butter. You can definitely taste the difference.
Wendi Spraker says
Hi Amber, Thanks so much for allowing me the opportunity to explain (again) why I use Crisco in this recipe. Most people viewing this recipe are doing so because they have failed with biscuits in the past. They need an easy, failproof way to make delicious flaky beautiful biscuits. Crisco Shortening offers this as it is pretty darn failsafe as long as you keep it very cold before using in the biscuits. Butter does not always render such a perfect result. Please, feel free to use butter if you desire. But from your comment it seems like maybe you already have biscuits downpat and don't need any of the advice in this article. Feel free to look elsewhere for a recipe with butter OR use butter in place of the Crisco and I wish you the best with getting perfect results.
Deborah Brooks says
I am so grateful for your sharing of this recipe. I was looking for a good old taste of home. I agree with what you say about Crisco. I haven't made homemade biscuits yet, but as a girl who grew up in the south, I KNOW it's all about the Crisco for that taste we all grew up with! Now if only I can find this flour. I live up north and may not be able to get it here. I will be looking to see if I can get it shipped across the border. Thanks again. I really miss home and cant wait to have a taste! Bless you for sharing your love of cooking with those of us who weren't able to learn how to make such amazing food! I will be looking to see your recipe for collards next.
Wendi Spraker says
Thanks Deborah, I hope this really helps you and if you have any issues, just contact me. Bless you.
Marilyn Jennings says
This is the best recipe i have found for biscuits. I have made a lot of recipes and this is by far the best. The biscuit by itself is so tasty and then add a little salted butter and even better. The jams taste good as well. These are light and fluffy too. I did use the White Lily flour. My mom always used this. But hers never tasted this good. Sorry Mom. The only thing i did different was to sift all the dry ingredients together. Thanks for sharing. GOD bless!!!
Wendi Spraker says
Making biscuits is a real art and it takes some practice. I'm glad you've enjoyed my recipe! Thanks for letting me know!
Elliott says
Hi Wendi! I think you may have helped me solve a mystery. I tend to get obsessed with one particular food at a time and for the last week I've been on a mission to make the perfect biscuit. After making several batches very similar to your recipe, although very good, I still felt there was something missing. Shortly before finding your recipe, it dawned on me—it wasn't the inside of the biscuit that perplexed me, it was the crust. I envisioned a crust that was sweet, crumbly and flaky, almost akin to a pastry. By the look of your biscuits, I think your addition of the evaporated milk brush is the answer. Like you, I'm not a food scientist but I think I see what's going on. When the water is removed from milk it leaves not only the concentrated fat but also the sugar, which is caramelized in the heating process of evaporation. By brushing with evaporated milk, you're getting the fat butter would provide, but also the browning, tenderizing and flavoring power of caramelized sugar, just like with a pie crust. Very clever on your part!
I also think you're on to something with the addition of baking powder to the self-rising flour. My great-grandmother gave me her recipe and hers called for self-rising flour, but also both a pinch of baking soda and cream of tartar, which together acts as an additional leavening agent. I'm sure it gives a little extra boost of fluffiness.
I can't wait to try this out. Thank you so much for the tips! On a side note, it's depressing that people can't even share recipes on the internet without some mean-spirited jerk using the comment board for therapy. Your response was a lot nicer and more professional than mine would've been. Don't let those people get you down. You have a great website here and I'll be certainly be back for more recipes. Happy holidays!
Wendi Spraker says
Hi Elliott! Are you my long lost sibling? That is how I go about recipes as well.... with an obsession until it is EXACTLY like I want. I LOVE the science behind cooking and totally recommend Cooks Illustrated Magazine, if you don't already read it. It's expensive and comes too infrequently, but is a JOY! Anyway, I am not exactly sure what makes these biscuits work, I'm just glad that they do. I started with a recipe that my daughter had in her high school cooking class cookbook. That teacher had recommended the evaporated milk on top. I read web sites and tried recipes and finally found two videos on YouTube of little old ladies making biscuits to get the rest of the recipe together. With a little from this and a little from that until it was where I wanted it. (Don't forget to ALSO brush butter on the top after baking! That makes a world of difference!) . Enjoy! I hope you signed up for the newsletter!
Calisson says
I'm wondering why you use baking powder with self-rising flour?
Wendi Spraker says
Hi Calisson, I'm not the best at the science. All I can say is that it works. 🙂 . I will say, it is because these biscuits need more than what is supplied in the flour. But they are fluffy and perfect!
Penny says
Yummy! I finally got biscuit making down. I watched my mom make these as a child and her biscuits were always fluffy and flakey at the same time. Bless her heart, she tried to show us girls how to make them but as an experienced baker she didn’t use actual measurements! It’s was a cup of this and dash of that, a spoonful of this (literally a spoon!) and mix, mix, mix! I finally gave up and decided canned or frozen biscuits were going to be all I could make. Maybe even Bisquick biscuits, which are okay, but not moms. Than I came across a recipe so similar to yours. And after several attempts I finally made my moms biscuits! Secret? No over mixing, over kneading, not twisting the biscuit cutter, and by all means, let those babies touch each other! That actually helps them to rise in the pan! Thank you for sharing another wonderful recipe! Totally love your scriptures at the end of your recipes as well!
Wendi Spraker says
Awwwwww Penny! What a wonderful story about your mom! A special and delightful cook, no doubt! Thanks for letting me know! 🙂 Have a great day!
jack says
Well, actually they are paying you to recommend all those specific things you lying hack. You do after all post affiliate links to each. So it turns out that no biscuit ever made by country grandmas and so forth before your recipe with these exact modern brand name products was "the right" type? Ridiculous crap..
Wendi Spraker says
Dear Jack,
I would really like to clear a few things up with you.
First of all, LOTS of country grandmas have been making delicious biscuits with LOTS of other ingredients for eternity.
For example, one could use just about ANY fat in place of the Crisco Shortening (I said so in the post). Butter or Lard works perfectly well. Beef Tallow would work too, supposing you could cut it up fine enough.
There are LOTS of flours available, even ones ground at your riverside local millstone!
Two dinner knives or your boot knife will work to cut the fat into the flour.
That said, the Crisco, White Lilly flour and the pastry cutter are all products that make the process of beginner biscuit making easier. None are new and modern.
White Lilly flour came on the scene in 1883. EIGHTEEN AND EIGHTY THREE, Jack!
Crisco Shortening (the most modern of my modern ingredients) got its start in 1911. That's been a while ago, right?
I couldn't find a reference for the use of pastry blenders and cutters, but I guarantee that it was prior to 1900.
My own grandmother, God rest her soul, used these very products. She wouldn't be a young thing if she were alive, Jack.
One final thing, I fully disclose all of the affiliate links noted in this post. That is easy to see. If someone were to click the photo, they would go through to Amazon and if they were to purchase, I would get a commission. That's all true.
This website offers the general public FREE access to recipes, cooking tips, methods for making every recipe, videos of the recipes being made and I even email with people to help them learn recipes if needed. The cost of producing this website is quite expensive, Jack. Do you begrudge me a small commission?
This website is a work of passion. There is no one who enjoys cooking more than me and I love to teach others too. That's why I write this website.
But let me tell you, none of the products mentioned in this post have paid me to say anything about them. Not one cent. I WISH that White Lilly flour, Crisco or a kitchen tools company like Diess would offer me a contract (perhaps someone reading this knows someone at those companies). That would be awesome.
Sadly, I am only suggesting those products because they are quality ingredients and perfect for the beginner biscuit maker.
So, Jack, your grandma and mine could make a mean biscuit out of about anything. But, today, it is a lost art. I hope someone will pick up a few tips and tricks here to make superb biscuits at home.
Jack, I can see that you may have had a bad day. Perhaps you don't realize that there is a real person on the other end of this website receiving your messages. I'm here and I have feelings. I work hard on this website. My heart and soul lay on these pages.
That said, I'll refer you to my privacy policy and disclosures pages that you can find a link to in the footer of the website. I disclose EXACTLY how this website makes money. Also, I disclose exactly how I deal with comments. Which, just so you know, I find your comment unkind. I wouldn't allow you to talk to me like that standing in my own kitchen. I won't tolerate it here either.
I sure hope your day gets better. I wish you the best. Peace and blessings to you Jack.
Wendi
Pamela Buchanan says
Well said Wendi! You lady have style and grace!
Wendi Spraker says
Hi Pamela! Thanks so much for the comment and thank you, as well, for the kind comments!
Mary Marshall says
My Grandma Hardy always used White Lily flour. She would not accept any substitution. Thanks Wendi for the recipe and all the hints! I was too young and foolish to listen to my grandma when she was living (she passed in 1990) but I know she would have approved of this recipe.
Wendi Spraker says
Hi Mary!
Thanks so much for the kind comment! I wish I had listened to my grandma too. She made the BEST biscuits. It's unfortunate that I had to figure it out myself and do so much research when I could have learned from one of the best biscuit makers ever! Thanks for sharing about Grandma Hardy!
Amy Goodman says
Wendi, I made these biscuits and they turned out perfectly! This was the first successful batch of biscuits I have ever made. Your pictures and explanations were extremely helpful. They tasted just like my grandmother’s did.
Wendi Spraker says
Oh Amy I am so happy for you! That’s great!!
Darlene says
My grandmother made these the same way except of Crisco she used lard. I remember watching her making these. I couldn't wait for them to be ready to eat. She would butter them with her homemade butter and hand me a jar of her strawberry jam. Sweet memories!
Wendi Spraker says
Awwww Darlene! Isn't that a wonderful memory? I hope you will sign up for my newsletter, I make A Lot of these old fashioned recipes and you might have other wonderful memories. 🙂
Moxie says
So, yeah, I tried these out and I did pretty good! I was proud of myself! Thanks!
Wendi Spraker says
So glad to hear that! Wonderful!
Ann says
Super great post with very valuable information! Thanks and may we all be better bakers and cooks with you good instructions!
Wendi Spraker says
Thanks Ann! It took me forever to figure out EXACTLY all the steps to perfect biscuits and I simply want to share what I have learned over the years. I didn't have the benefit of having a mentor to teach me and I suspect that many of us don't. :). Thanks for the comment!
Mary says
Fantastic post! Biscuits look so perfect....tips & photos great. Pinned. Thanks for sharing. Have a good week.
Wendi Spraker says
Hi Mary! So good to see you here! Thank you! I hope all is well with you!